 DIRTY
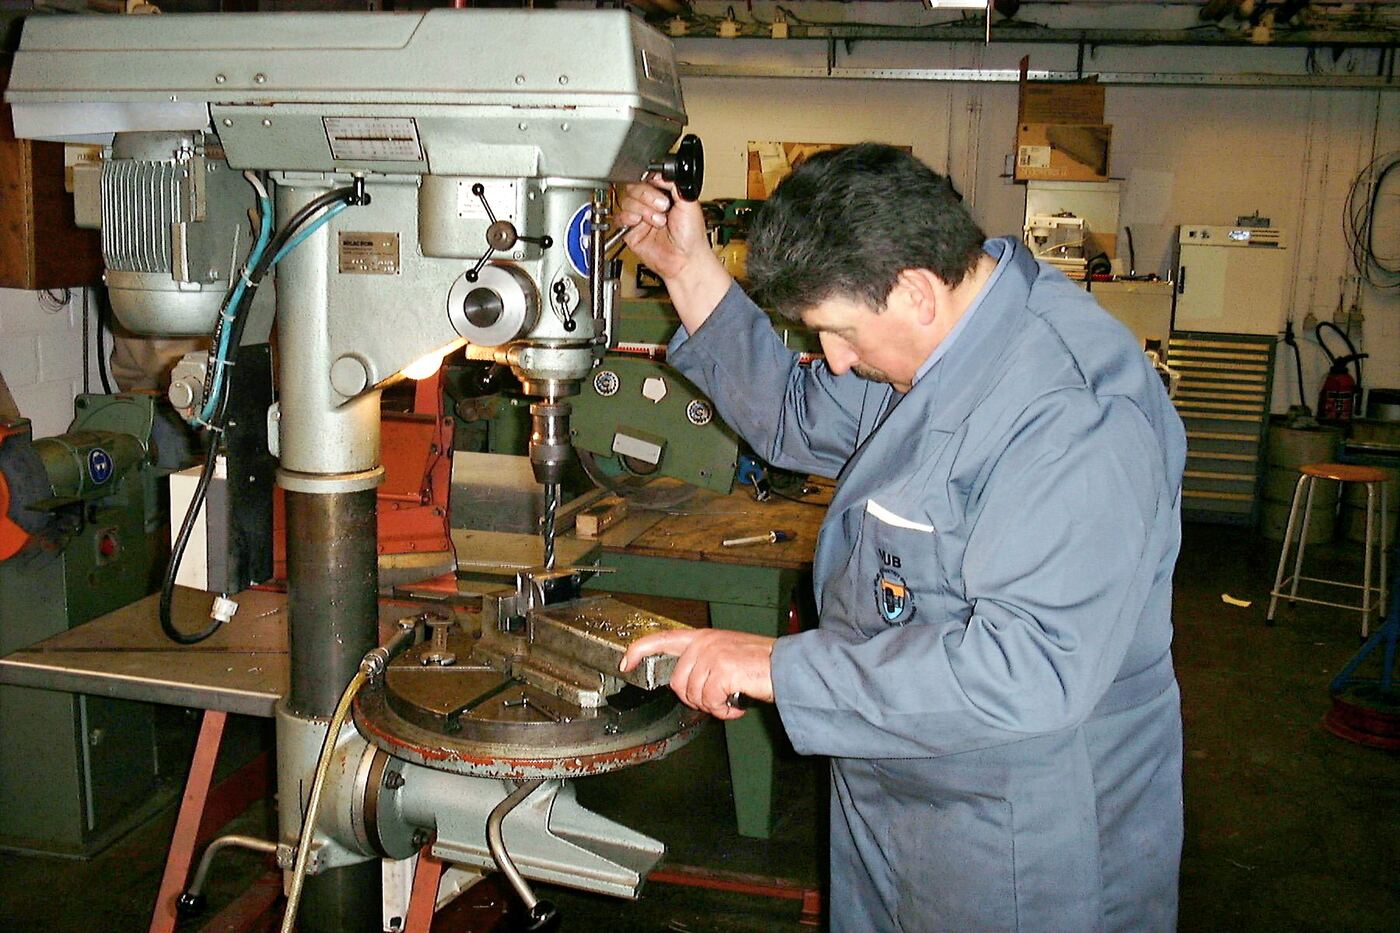
Stainless steel rarely destroys a good drill bit in one dramatic moment. More often, the sound climbs, the chips get smaller, the operator leans harder and the end of the bit starts to polish instead of cut. A few seconds later the cutting edges are hot and blunt — and the patch of metal below them may be harder than it was when the hole began.
That is the trap. Common austenitic grades such as 304 and 316 work-harden readily, while their relatively low thermal conductivity keeps more heat around the cutting edge. If the drill rubs, pauses under load or runs too fast, the next revolution has a tougher job than the last.
The answer is not brute force. It is a sharp tool, a rigid setup, a low enough cutting speed and a feed that keeps the edges making real chips.
This guide covers ordinary workshop holes in 304/304L and 316/316L sheet, plate and sections. Hardened stainless, duplex and precipitation-hardening grades can need different tooling and cutting data. Critical parts must follow the drawing, the drill manufacturer's data and the job procedure.
The short version
Before getting into the detail, these are the habits that solve most stainless drilling problems:
- clamp the work — never try to hold it by hand;
- use a sharp premium HSS or HSS-Co drill intended for stainless steel;
- choose a short drill rather than a long flexible one when both will reach;
- run slower than you would in mild steel;
- use cutting fluid and get it to the point of the drill;
- apply enough steady feed to make chips instead of dust;
- do not dwell in the bottom of the hole;
- ease the pressure as the drill breaks through;
- stop and sharpen or replace the bit when it stops cutting cleanly.
The International Molybdenum Association's fabrication guide says the same thing in machining language: use a rigid setup, a sharp cutting edge, positive feed below the work-hardened layer and generous coolant at the cut. IMOA: Practical Guidelines for the Fabrication of Austenitic Stainless Steels
Why stainless punishes a rubbing drill
Three things happen together.
First, austenitic stainless steel hardens as it is deformed. A cutting edge that is not taking a proper chip still presses and smears the surface. That cold work leaves a hardened skin for the next pass.
Second, stainless does not carry heat away through the workpiece as readily as carbon steel. More of the heat stays close to the drill point and the chip. With an HSS drill, overheating can soften the cutting edge. Once that edge loses its shape, friction rises quickly and the failure feeds itself.
Third, stainless is tough and ductile. It can make long chips that pack the flutes, block cutting fluid and add more friction. Deep holes make this worse because the point is buried and the chips have farther to travel.
This is why “go slowly” is incomplete advice. The spindle should be slow enough, but the cutting edges still need a positive feed. Very low rpm with a timid hand can rub just as surely as high rpm.
Choose the bit before choosing the speed
A fresh, correctly ground HSS drill can drill standard 304 or 316. For repeated work, an HSS-Co drill is usually the more forgiving workshop choice because cobalt-alloyed high-speed steels retain hardness better when the cutting edge gets hot. Bosch, for example, specifies HSS-Co drills for stainless steel, while voestalpine lists high hot hardness as a key property of cobalt-alloyed HSS used for twist drills.
That does not make every gold, black or cobalt-coloured bit suitable. Coating colour is not a specification. Look for the tool material, point geometry and recommended workpiece material on the manufacturer's data.
For ordinary twist drilling:
- Premium HSS: workable for occasional holes if it is sharp and correctly run.
- HSS-Co: a strong general workshop choice for 304 and 316.
- Solid carbide: capable of much higher performance, but it wants a rigid machine, accurate alignment and controlled feed. It is a poor cure for a flexible hand-drill setup.
- Step drill: useful for clean holes in thin sheet when the tool is specifically rated for stainless steel. A step drill is not the tool for deep plate.
- Carbide-tipped hole cutter or annular cutter: often the better route for larger diameters, provided the machine, arbor and cutter are rated for the job.
IMOA recommends a 130-degree point for chip breaking and self-centring geometry with web thinning on larger drills. Many commercial stainless drills use a point in the 130–135 degree range. The exact angle matters less than having two equal, sharp cutting lips and a point suited to the toolmaker's intended feed. A badly sharpened “stainless bit” will still wander, squeal and oversize the hole.
Set the job so the drill cannot chatter
A drill press is easier to control than a hand drill because the spindle stays square and the feed is steadier. Whichever tool you use, reduce movement before the first chip forms.
- Mark the hole and use a centre punch or spot drill where the surface and job allow it. On thin finished sheet, use a tool and method that will not distort the panel.
- Support sheet close to the hole. A clean sacrificial backing plate helps reduce distortion and the grab at breakthrough.
- Hold the part in a drill vice or with clamps. Position the clamps so the drill cannot hit them.
- Use the shortest drill that reaches the required depth, and keep only the necessary length outside the chuck.
- Check that the drill runs true before touching the work. A bent drill, dirty chuck or excessive runout loads one lip harder than the other.
- Remove the chuck key and keep loose clothing, jewellery and long hair away from the spindle. Do not wear gloves at a drill press.
The Canadian Centre for Occupational Health and Safety is unambiguous on the last points: clamp the work, remove the chuck key, keep the bit sharp, lubricate when drilling metal and do not wear gloves around the rotating spindle. CCOHS: Drill Press Safety
A sensible starting speed for 304 and 316
For standard austenitic grades drilled with HSS, IMOA gives a cutting-speed range of 10–12 m/min for drills 5 mm and larger, with lower ranges for very small drills. The table below uses a conservative 10 m/min starting point. It is not a replacement for the drill maker's data, but it is far closer than leaving a drill press at the high speed used for wood or aluminium.
| Drill diameter | Approximate rpm at 10 m/min | IMOA starting feed for standard grades |
|---|---|---|
| 3 mm / about 1/8 in | 1,050 rpm | 0.05 mm/rev |
| 5 mm / about 3/16 in | 640 rpm | 0.10 mm/rev |
| 6 mm / about 1/4 in | 530 rpm | Use toolmaker data |
| 8 mm / about 5/16 in | 400 rpm | Use toolmaker data |
| 10 mm / about 3/8 in | 320 rpm | 0.20 mm/rev |
| 12 mm / about 1/2 in | 265 rpm | Use toolmaker data |
| 15 mm / about 19/32 in | 210 rpm | 0.25 mm/rev |
The rpm comes from:
rpm = (cutting speed in m/min × 1,000) ÷ (π × drill diameter in mm)
If a machine does not have the exact speed, choose the nearest lower setting and watch the cut. Coated HSS-Co, carbide and specialised drills may use different data. Follow the manufacturer's figures when they are available.
With a hand drill, rpm is harder to measure. Use the low gear, start below full trigger speed and listen to the cut. A high-pitched squeal with little or no chip is a warning, not proof that the bit needs more time.
The drilling sequence that works
1. Put cutting fluid on the point
Use a cutting fluid suitable for stainless steel and for the way the part will be cleaned afterwards. A light spray around the hole is not enough if the fluid never reaches the cutting lips. On a drill press, apply it at the point before starting and replenish it as the hole deepens.
For food, pharmaceutical, oxygen-service or other controlled work, use only approved products and follow the cleaning procedure. Do not substitute an unknown oil just because it is within reach.
2. Establish the cut without rubbing
Bring the spinning drill to the mark and apply a steady feed. The first aim is to form two real chips, one from each cutting lip. On a hand drill, brace the tool so the bit cannot skate or tip sideways.
Do not “tickle” the surface for several seconds. That is how a shiny dimple becomes a work-hardened dimple. If the point will not bite, stop and fix the cause: sharpen the bit, improve the starting mark, reduce runout or choose a self-centring tool.
3. Keep the feed positive
Once the drill is cutting, keep it moving. The feel should be firm and controlled, not violent. On a drill press, the feed figures in the table give a useful scale. On a hand drill, the evidence is in the chips: both lips should be cutting, and the chips should have recognisable thickness rather than looking like glitter or powder.
Do not stop feeding while the drill continues to spin against the bottom of the hole. If the cut must pause, withdraw the drill, clear the chips, add fluid and restart decisively.
4. Clear deep holes before the flutes pack
IMOA recommends periodically withdrawing a solid HSS drill so coolant can reach the point when hole depth exceeds about twice the drill diameter. Through-tool coolant can change that requirement, but ordinary workshop drills do not have it.
Pecking does not mean bouncing the point against the bottom. Cut a controlled distance, withdraw far enough for chips and fluid to clear, then feed back into the cut. The deeper and smaller the hole, the more attention chip evacuation needs.
5. Ease off at breakthrough
The drill is most likely to grab as the remaining material becomes thin. Reduce pressure just before breakthrough while keeping the drill cutting. This is particularly important in sheet, where a large twist drill can snatch the part or pull itself through.
For thin sheet and larger finished holes, a stainless-rated step drill often gives better control than forcing a large twist drill through in one step. Bosch's HSS step-drill guidance highlights the split point, chip removal and reduced vibration; the specific tool still needs to be rated for stainless and run to its own instructions. Bosch Professional: HSS-AlTiN Step Drill
What the sound and chips are telling you
A drilling chart gets you close. The cut tells you whether the setup is actually working.
| What you see or hear | What is probably happening | What to change |
|---|---|---|
| Sharp squeal, almost no chips | The drill is rubbing | Stop; sharpen or replace the bit, reduce runout and restart with positive feed |
| Chips from one flute only | Unequal lips, runout or misalignment | Check the grind, chuck and spindle alignment |
| Smoke and rapid edge discolouration | Too much speed, poor lubrication or a dull edge | Stop before the bit softens; correct the cause |
| Long chips packed in the flutes | Poor chip evacuation | Withdraw, clear chips, add fluid and shorten the peck |
| Heavy chatter | Flexible setup, excess overhang or unstable feed | Shorten the tool, clamp closer and improve rigidity |
| Bit grabs at the exit | Too much pressure at breakthrough or poor support | Support the work and ease feed before the drill breaks through |
| Hole is oversized or triangular | Chatter, runout or unequal cutting lips | Correct the setup and regrind accurately |
A bit that has gone dull will not recover because more oil was added. Once the cutting edge is rounded or softened, sharpen it correctly or replace it. Continuing usually costs a drill and leaves a harder spot in the part.
If the hole has already work-hardened
Do not keep polishing the same spot with the same damaged bit. Withdraw, let the part and tool cool, and inspect the cutting edges. Then correct the setup before trying again.
A sharp tool must take a real cut beneath the hardened skin. That calls for rigidity and positive feed, not a faster spindle. If the drill press, hand drill or part cannot provide that control, change the process: use a properly supported carbide tool, a suitable cutter, or have the hole machined on a rigid machine. On an expensive part, this is cheaper than breaking a hard tool in a half-finished hole.
Finish the hole without planting a rust problem
Deburr both sides with tools that are clean and suitable for stainless. For work where appearance or corrosion resistance matters, keep abrasives and brushes dedicated to stainless steel. Carbon-steel particles transferred by a contaminated tool can later appear as rust staining on an otherwise sound stainless part. IMOA specifically recommends separate, colour-coded tool sets for stainless work.
Clean away cutting fluid and chips using the approved method for the job. Inspect the diameter, position and burr condition only after the spindle has stopped. Never clear swarf with a bare hand; use a brush, hook or vacuum suited to the machine.
Bench checklist
Before pressing the trigger or pulling the feed handle:
- correct grade and hole size confirmed;
- sharp drill suitable for stainless;
- work supported and clamped;
- drill running true with minimum overhang;
- sensible rpm selected;
- cutting fluid ready at the point;
- eye protection on, chuck key out, no gloves near the spindle;
- chip-clearing plan for a deep hole;
- backing and reduced feed planned for breakthrough.
The useful rule is simple: slow the surface speed, not the cut. A sharp drill at a sensible rpm, fed firmly enough to make chips, will outlast a more expensive bit that is allowed to rub. Stainless steel is demanding, but it is predictable once heat, rigidity and feed are under control.
References and original documents
This is an independent explanation, not a hands-on test or endorsement.
- International Molybdenum Association — Practical Guidelines for the Fabrication of Austenitic Stainless Steels — Authoritative fabrication guide covering work hardening, rigidity, tool sharpness, coolant, point geometry, pecking, cutting speed and feed for HSS twist drills.
- Canadian Centre for Occupational Health and Safety — Metalworking Machines: Drill Presses — Drill-press safety guidance on clamping, lubrication, sharp tools, breakthrough, chip removal, chuck keys, clothing and gloves.
- Bosch Professional — PRO Stainless Steel HSS-Co Twist Drill Bit — Manufacturer specification for cobalt-alloyed HSS twist drills designed for stainless steel.
- voestalpine High Performance Metals — Twist Drills and Taps — Tool-steel reference covering HSS, cobalt-alloyed HSS, carbide, cutting-edge geometry, lubrication, speed, feed and hot hardness.
- Bosch Professional — HSS-AlTiN Step Drill Bit — Manufacturer guidance for split-point step drilling, chip evacuation and low-vibration drilling in sheet, including stainless steel applications.
- Wikimedia Commons — Drillpress.jpg — Cover photograph by LHOON, with levels adjusted by Hohum, licensed CC BY-SA 2.5.
This article is general workshop guidance, not a machine-specific operating procedure. Follow the drill, machine and cutting-tool manufacturers' instructions. Safety-critical, pressure, structural and regulated work must follow the drawing, applicable standard, approved process and inspection plan.
Comments
Real experience is welcome here. Disagree with the article, the sources or another comment — keep it useful and respectful.
No comments yet. Start the discussion.